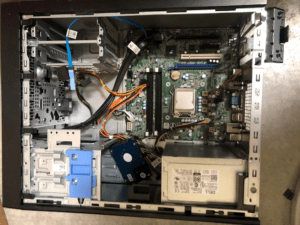
So, are you a PC gamer that is tired of gaming on a laptop? If so your can sell your laptop to SellBroke. Maybe you just need an upgrade from your older PC to a new one? Or perhaps this is your first time building a gaming PC. Regardless of what category you fall under, this article would guide you through the process of building your own gaming PC.
Pro Tips
- Before you start building your gaming PC, make sure that you have a flat surface like a table.
- Discharge your body of any accumulated charge by touching any metal object that is grounded before touching your PC parts.
- Get a good lighting source or a well-lit room.
Parts Needed
To build your gaming PC here are the essentials parts you need:
- A gaming capable processor like the Intel Core i7-8700K or above.
- Fast RAM of up to 16GB DDR4 or more, with a transfer speed of 3200Mhz.
- A powerful Discrete graphics card like a Nvidia RTX 2070 graphics card or above.
- An NVMe SSD storage system like a Samsung Evo of up to 500GB or above memory space.
- A high efficiency cooling fan system.
- A Power supply system powerful enough to power your gaming rig like an EVGA G3 of up to 750W power output.
- A motherboard that will support all of the parts mentioned above both in terms of CPU clock speeds, power output and port selection.
- A beautiful case to house all the components of your powerful gaming PC.
Installation Guide
- The first thing you need to do is remove your motherboard out of its sleeve and place it on a flat surface that is clean and balanced. The next thing you need to do is to remove the plastic covering the CPU socket and pull the cover up, to prepare it for your CPU installation. Put the CPU into the CPU socket and push back its lever in place. The plain silver side would be facing up.
- Install your RAM sticks in the RAM slots provided on your motherboard
- Unscrew the back of your PC case to open it. Then make sure the case is laying flat on its side on your table, while the open side is facing up.
- Install the I/O shield that comes with your mother board in the PC case I/O ports. However, you can skip this step if the I/O shield is permanent fix to the motherboard.
- Put the motherboard in the case and screw it into place firmly, be gently in order not to break the mother board.
- Connect all the appropriate wires to the motherboard and the PC case.
- Install the Power Supply Unit (PSU) in the case and connect it to the motherboard. Make sure that the vent of your PSU is not blocked while it is in the case. Allow it face up if there is no vent at the bottom of your case, or if you will be putting your case on a carpet.
- Install your cooling system on the top of your processor and connect it to the Motherboard.
- Install your SSD drives on the motherboard.
- Now, you can install your graphics card on the motherboard and connect its connection cables to the motherboard.
- Before closing your case completely, start up your system and ensure that you connect your PC to a monitor (via the video card), as well as a keyboard too. Then check to see if the system would boot up.
- Make sure that your computer turns on and your BIOS screen pops up on the monitor.
- Now you can tidy the cables in the PC casing and screw the back shut.
Congratulations, you have successfully built your first gaming PC. To get the installation process properly, you might have to watch in-depth videos that talks about each part of the installation process.


