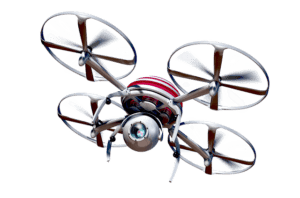
A spy drone is an unmanned vehicle that may have any function, depending on what you designed it for. It can be used for taking pictures or recording videos during flight. Your spy drone can have different uses, such as using it to watch over your neighborhood or to know when your little kid is about to sneak out. But using a spy drone to look at your sexy neighbor is not good and may be punishable under the law. You can get a complete unit from stores that sell drones or you can build one yourself. Without further ado, let’s go straight into the steps required in building a spy drone from scratch.
Firstly, to build a spy drone, some necessary materials are needed, they include:
- Frame
- Motors: 4 motors are required
- An electric speed control: for delivering power to the motor
- Propellers
- Connectors
- Power distribution board
- Battery
- Battery monitor
- Mounting pad
- Controller
- RC transmitter and receiver
- Camera
- USB key
In addition to the parts named above, you need AWG silicon wire, thread locking compound, battery charger, and a servo lead wire.
Now let’s go straight to the steps in building your drone:
Step 1: Designing the frame
Making a frame is the first thing to do in building your drone, which could be made with plastic, metal, or wood. If you are using wood, cut the wood board of about 60cm and 25-30mm thick and make an X- frame with the board.
Step 2: Assemble the motors
Drill some holes in the wooden frame to fit in the four motors using the distance which will allow free movement of the clip and shaft of the motor.
Step 3: Fix the electronic speed controllers and land gear
Immediately after mounting the motors, you have to fix the speed controllers at the bottom side of the drone using zip ties then adding the land gear to reduce the risk of shock when landing the drone.
Step 4: Choosing the right remote controller
The remote controller is needed to control the drone during flight, and various controllers are available nowadays, such as Flysky, Futaba, and so on.
Step 5: Fix the flight controller
After choosing the right controller, you need to fix it on top of the frame in a straight direction for easy control.
Step 6: Mount the camera
The camera should be mounted in a forward viewing position. An HD camera is a good fit for a clearer vision. The location of the camera is what makes the spying easy; the front of the drone is the best place to place the camera.
Step 7: Connect the battery
Connect the battery to the lower part of the frame; the battery monitor should be fixed to and make sure it is tight so as not to fall off during flight.
Step 8: Test your drone and take off
After fixing all the necessary materials, you have to test your drone to make sure everything is working by checking all the functions.
Finally, you should try flying the drone around and make sure it is not drifting. If it is drifting, trim the edges of the frame.


