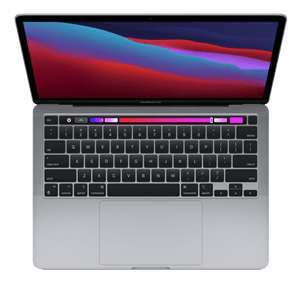
 These are the things you need to do if you have accidentally deleted or format something from your Mac. The ultimate question is: how do you recover lost files? There are very effective methods of restoring a reset files on your MacBook, and I will be dropping five.
Before I begin, I would like to drop a pro tip to recover your lost file. One of the best things to do is to immediately stop using a memory card or device. This will reduce the risk of overwriting files and increase the chances of you recovering your files back. Whether you want to sell your MacBook or keep using it you shoudl read this article first.
1. Check the Recycle Bin
It is vital to make sure that the files were actually deleted. Most people don’t bother to check their Recycle Bin after losing files. But you should do so to confirm the loss. You can find that out by clicking on the bin icon and searching for the deleted file you suspect.
If you find the file, you will right-click and select the “Put-Back” option. Afterwards, you can use finders to verify the files initial position. But if you can’t find the file in the Recycle Bin, the next thing you can do is activate Time Machine.
Overall: Check the first place it would be.
2. Use Time Machine
Time Machine is an inbuilt propriety disk backup solution that is built into all Macs. To search for files on Time Machine:
- Connect the file that contains the Time Machine backup
- Launch the program.
- Open a Finder’s window
- Search for the file in the last remembered place
- Scroll back until the lost file appears on the Finder window.
- Select the file and click “Restore to Recover”.
The tricky thing is you must have Time Machine enabled on your computer before the files are deleted. And because most people do not know about the Time Machine feature, it makes it hard to recover files. But there is an option of using a proprietary Mac-based file recovery system that is powerful enough to recover our files for us.
Overall: Educate yourself before you act.
3. Data Recovery Software
The software we will go over is called Disk Grille. This powerful software suite combines state of the art file recovery, data protection, and data backup tools all into one. To get started, you must download, install, and launch Disk Grille.
Next, connect the drive you want to recover and connect the disk containing the lost files called the Disk List. Then click on the Recover button to start scanning for lost files. Review all items when the scan is complete using the File Structure.
Afterwards, you can preview your recovered files with the “I” icon you will see on the screen. Click the checkmark, choose your save location, (Desktop for example), and then click Recover. Once this process has been completed, you can check for the files in the specific recovery location.
Overall: Find a little help from outside sources.
4. Check iTunes and Photo
It is essential to go to this option if you have lost a bunch of photos. You can check this by opening the Photo app and navigating to “Recently Deleted”. This opens up the Recently Deleted folder where you can attempt to recover your images or videos.
You can check iTunes for lost music or videos that have been previously downloaded. Making it easy to re-download them using the previously purchased tab within iTunes.
How you do this is:
- Open iTunes.
- Sign in with your Apple ID.
- From the menu bar:
- Click account.
- Purchase.
- Look through the files.
- Locate the item you want to restore.
- Click “Download” to get the new version on your computer.
Overall: Check the last place you would look.
5. Using the Terminal Program
The Terminal program is a command-line feature that allows us to search the Mac system for lost files. You will launch the Terminal application and enter the “CD.trash” command. Open the Finder window, and you will see that the recovered file is in its original location if it is successful.
Overall: Exhaust all options from within the laptop.
Conclusion
Whenever you find yourself in a pinch with file recovery, these options are an extremely powerful method for getting your files back. And more than likely, you will be successful. If not, you can sell broken MacBook laptop to us for cash and buy a new one.
For more news on the latest tech, or replacing your old tech, visit sellbroke.com.

